How to Use Heat Transfer Vinyl: Easy Step-by-Step Tutorial
Have you ever wondered how to turn a simple design into a professional-looking custom shirt or bag using heat transfer vinyl?
The process is straightforward once you get the hang of the right steps.
By the end, you’ll know how to create, cut, weed, and apply your vinyl for crisp, durable results.
Keep reading for all the tips you need to master the technique.
What Is Heat Transfer Vinyl and Why Use It?
Heat transfer vinyl (HTV) is a popular material for adding personalized designs to fabric. It’s a thin vinyl or plastic sheet with a heat-activated adhesive backing that bonds securely to fabrics when heat is applied. HTV comes in a variety of colors and finishes, providing almost unlimited options for customization. It works well on soft materials such as T-shirts, bags, and hats, making it ideal for small projects or personal crafts. Not all HTV lasts equally long; quality varies. To ensure a successful application, it’s important to consider the type of fabric you’re working with, as different materials respond differently to heat and pressure. When used properly, HTV produces a durable, professional-looking design that withstands multiple washes without peeling or cracking. Proper technique and selecting the right type of HTV for your fabric are key to achieving the best results. Additionally, understanding the heat-activated adhesive can help you achieve more consistent and lasting results, especially when working with various fabric types. Knowing how different material responses to heat can influence the adhesion process is also beneficial for optimal results. Being aware of heat transfer methods can further improve your overall application results and durability.
Preparing Your Design and Setting Up Your Software
To prepare your design file and set up your software, start by opening your design in a compatible program like Cricut Design Space, Silhouette Studio, or Adobe Illustrator. Resize your design to match the dimensions of the area on your garment for accurate placement. If your design uses multiple colors or contains intricate details, check the saturation and brightness levels to prevent color bleeding or mismatched hues later on. Before cutting, remember to mirror your design because heat transfer vinyl (HTV) is cut from the adhesive side; unmirrored designs will transfer backwards onto your garment. Use path-joining tools like Weld for overlapping elements or script fonts to ensure clean cuts. Opt for vector formats such as SVG because they produce sharp, scalable edges that facilitate smooth cutting of both simple and complex designs. Additionally, understanding cut quality can help you choose the best settings and tools for precise results. Consider material compatibility and manufacturer recommendations to prevent issues like peeling or cracking. Lastly, adjusting blade depth or pressure according to the specific type of vinyl can improve cut accuracy and reduce the need for re-cutting.
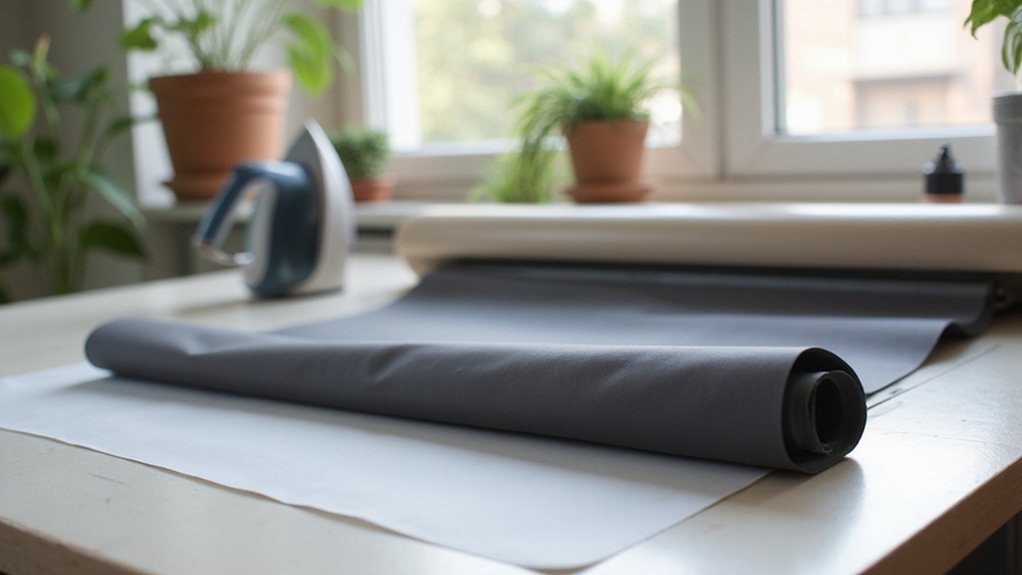
Cutting and Weeding Your HTV for Precise Results
To cut HTV accurately, you need to face the vinyl side, not the clear liner, toward the blade. Many HTVs have a shiny side on the bottom, which is the vinyl, and a duller side on top—the liner. Always verify this with a corner peel test: gently lift a small corner to see which side releases easily and ensure you’re cutting on the correct surface.
Proper design alignment on the cutting mat is crucial. Place your HTV with the shiny, vinyl side facing down and align your design precisely before cutting. This helps ensure clean, accurate cuts and prevents frustration later. Set your cutting machine to the correct material type, typically vinyl, and do a test cut. Use small shapes like a ½-inch square with a triangle inside to check the blade depth and pressure. Adjust as needed to avoid cuts that are too shallow or too deep. Considering the blade depth and pressure settings can significantly improve the quality of your cuts. Additionally, ensuring the correct side of HTV is facing down can help achieve more consistent results.
When weeding, start from the outside edges and carefully remove excess vinyl while preserving fine details within your design. Good lighting and a tidy workspace improve control and visibility, making weeding easier. This careful process results in cleaner, more professional-looking finished designs without accidentally tearing or damaging your HTV. Additionally, heat transfer vinyl can be effectively ironed on, but it’s important to follow specific temperature and time guidelines to ensure proper adhesion and a durable finish.
Prepping Your Garment for Heat Transfer
Prepping your garment properly is crucial for a successful heat transfer. Begin by pre-pressing the fabric for 2 to 10 seconds to remove moisture and smooth out wrinkles. This step ensures better adhesion and helps prevent uneven application. For fabrics like 100% cotton, wash and dry the garment first without using fabric softener, which reduces the risk of shrinkage later on. Use a flat, smooth pressing surface to minimize wrinkles and ensure consistent contact around seams and pockets. If the garment features buttons or thick areas, insert a heat-resistant pillow inside to distribute pressure evenly. Keep the garment completely still and unpulled before applying heat. Maintaining proper temperature—usually around 305°F to 320°F—is vital because inconsistent heat can cause poor adhesion. Always calibrate your heat press or heat gun before starting to ensure temperature accuracy. Proper temperature control ensures a durable transfer and consistent results.
Positioning and Pressing Your HTV Design Perfectly
To position your HTV design perfectly, fold the garment in half and create a light crease to find the center. Use this crease as your main guide for alignment, ensuring the top of your design sits about 3 inches below the collar or follows the “three-finger rule,” which means leaving enough space so three fingers fit comfortably between the collar and the design. Measure the garment across the chest to determine its width, and keep your design several inches away from the sides to maintain consistency and prevent uneven placement. When pressing, preheat the heat press, set the appropriate temperature for the vinyl and fabric, and apply medium pressure. Hold the design firmly in place without sliding it, then cover it with a protective sheet before pressing. Creating a light crease helps locate the center and simplifies accurate placement. Additionally, understanding the compatibility of heat transfer vinyl with different materials can aid in achieving better adhesion and durability for your projects. Knowing the proper heat press settings can also prevent issues such as peeling or burning. For optimal results, consider the uses and functionality of your heat transfer vinyl and how different settings impact the outcome. After the initial press, inspect the edges and re-press if necessary. This technique ensures your HTV application is straight, clean, and properly aligned, giving your finished project a professional look.
Peeling Carrier and Finishing Your HTV Project
Peeling the carrier sheet at the right time is crucial for a clean and durable HTV transfer. Follow the manufacturer’s instructions because peel timing varies depending on the vinyl type. Cold-peel products should be peeled only after they have fully cooled, while hot-peel types need to be removed while warm. If you’re unsure, waiting 24 to 48 hours before washing is a good practice to ensure the adhesive has fully cured. When peeling, start at one corner and gently lift the carrier with a smooth, controlled motion to avoid lifting or tearing the vinyl. Stop peeling if you notice the vinyl starting to lift from the fabric. After removal, check the entire design for lifted edges or incomplete adhesion. If needed, re-press those areas with a protective covering to secure the vinyl and achieve a professional, lasting finish. Understanding heat transfer techniques can further help in achieving perfect results. Additionally, practicing proper peel timing ensures the longevity and quality of your transfer. Remember, the consistency of your application process also plays a vital role in your project’s overall durability.
Troubleshooting Common HTV Application Problems
Incorrect heat, time, or pressure are the main causes of HTV peeling or not sticking properly. To avoid these issues, follow the manufacturer’s instructions precisely for each vinyl type. Under-pressing only partially activates the adhesive, causing weaker bonds, while over-pressing can burn the adhesive or damage the design. Use a heat press for consistent pressure and temperature. The dollar bill test—t inserting a dollar bill between the press platen and the fabric—can help gauge proper pressure, ensuring enough contact without overdoing it. Surface contaminants like lint, oils, or residues from fabric finishes can inhibit adhesion, so pre-wash the garment and lightly wipe the application area with isopropyl alcohol before applying the vinyl. Thick seams, zippers, or bulky obstacles may prevent even contact; in such cases, use a pressing pillow to help the vinyl conform and ensure good adhesion. Proper layering is essential—avoid excessive stacks that can prevent the vinyl from adhering well. Maintaining consistent pressure with the heat press is crucial, as uneven pressure can lead to inconsistent adhesion across the design. Additionally, using appropriate surface preparation ensures the best possible bond between the vinyl and fabric. Surface contaminants can also impact adhesion, so thorough cleaning and preparation are key. Finally, wait at least 24 hours before washing the finished item to allow the adhesive to fully cure, which significantly improves durability and adhesion longevity.