How to Clean a Cricut Cutting Mat: Step-by-Step Guide
Getting grime on your Cricut cutting mat can be frustrating, especially when it starts to lose its stickiness.
Luckily, a simple cleaning routine can restore its grip and extend its lifespan.
With just a few gentle steps, you can keep your mat in top condition and ready for your next project.
Keep reading for all the tips you need to keep your mat clean and sticky.
Why Your Cricut Mat Stops Sticking and How to Fix It
Your Cricut mat can lose its grip when the adhesive deteriorates. This usually happens due to fiber buildup, dust, oils, and leftover residue on the surface. Tiny fibers, lint, and threads can interfere with adhesion even after cleaning. When the adhesive weakens, your materials won’t stay in place during cutting, leading to frustrations and inaccurate results. Regular cleaning with alcohol-free baby wipes or warm water and soap helps remove debris and maintain tackiness. If cleaning alone doesn’t restore the grip, you can re-stick the mat using spray adhesive or other methods designed for this purpose. Sometimes, the damage is too extensive, and replacing the mat becomes the best option. Proper maintenance and knowing when to replace your Cricut mat will help keep your projects precise and secure. Keeping your mats in good condition can also extend their lifespan and save money over time. Using the appropriate cleaning techniques and understanding the adhesive properties of your mat are essential for effective maintenance. Remember that adhesive deterioration is a common issue that can often be remedied with proper care before replacement is necessary. Additionally, understanding how fiber buildup and residue affect adhesion can help you implement the best cleaning practices.
Assess Your Cricut Mat’s Dirty or Sticky Condition
To assess your Cricut mat’s condition, start by checking its stickiness level. A slight tack loss means the mat still grips your material but may not release cleanly. Severe tack loss causes the material to shift easily, indicating it’s time for cleaning or replacement. Next, examine the surface for contamination. Look for paper fibers, lint, hairs, and small scraps, especially in the corners and edges where debris tends to collect. Regular cleaning maintenance helps prevent the buildup of debris and prolongs the life of your mat. Inspect the adhesive layer by feeling the surface; it should feel tacky but not gummy. Slick or uneven spots suggest the adhesive may be compromised. Observe the overall wear pattern—dirt buildup in high-use areas or smoother patches from repeated use can tell you whether the surface needs cleaning or if the adhesive needs restoring. Adhesive integrity refers to how well the adhesive layer is holding and whether it remains effective over time. A thorough assessment also involves checking whether the acrylic sheets you use, which may be cut with a Cricut, have affected the mat’s surface, as rough or sharp edges can accelerate wear. Additionally, understanding how self-healing properties work on cutting mats can help you determine if minor surface scratches or cuts have healed, indicating the mat’s continued effectiveness. Finally, determine if the contamination is only on the surface and whether the adhesive layer remains intact. If debris is superficial and the adhesive is still tacky, cleaning will likely suffice. If the adhesive feels dull or uneven, you may need to consider rinsing or reapplying adhesive to restore the mat’s stickiness. This thorough assessment helps you decide the best cleaning or restoration method for your Cricut mat.
Remove Surface Dust and Debris With a Lint Roller or Tape
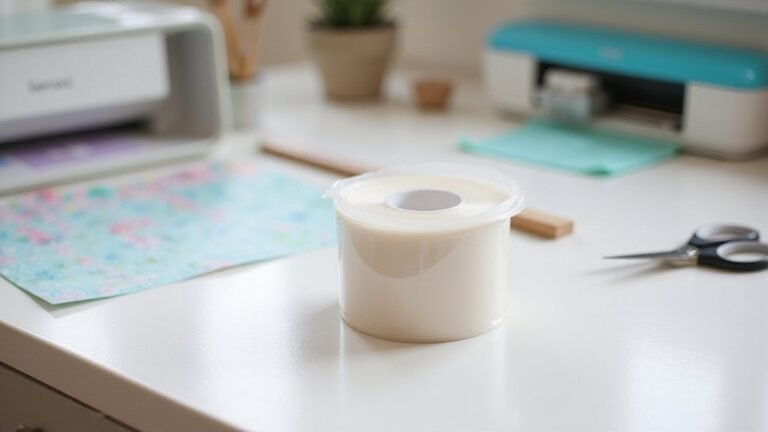
Remove surface dust and small debris from your Cricut cutting mat, start with a lint roller. Use gentle, light passes to lift loose dust, fluff, hairs, threads, and tiny paper particles from the surface. Rolling across the entire mat ensures an even clean, helping restore the mat’s tackiness. Be careful not to press too hard, as applying excessive pressure can damage the adhesive layer. For stubborn lint and fibers, Cricut recommends lifting them with tweezers before using a transfer tape. Tape works well for fine fibers and small debris stuck within the adhesive texture. Performing this surface cleaning step before wet cleaning is essential; it prevents debris from spreading and extends the lifespan of your mat’s adhesive. Always keep your removal gentle to effectively eliminate debris without risking damage to the mat. Additionally, ironing-on permanent vinyl is not recommended, as it can damage both the vinyl and the cutting mat’s adhesive surface. Knowing the proper cleaning techniques for adhesive surfaces can help you maintain the longevity and performance of your mats. Regularly inspecting and cleaning your mat ensures consistent cutting results and prolongs its usability, especially when proper maintenance is practiced.
Light Surface Cleaning With Baby Wipes
Light surface cleaning with baby wipes is an effective way to quickly refresh your Cricut cutting mat’s surface. Use alcohol-free, unscented, and lotion-free baby wipes to prevent residue buildup that could hinder adhesive performance. Gently wipe the entire surface in small circular motions with light pressure to remove dust, fibers, and debris. Avoid scrubbing or pressing too hard to prevent damaging the adhesive layer. Replace the wipes frequently to ensure effective cleaning. After wiping, allow the mat to air dry completely—this may take about ten minutes or longer—before using it again. This gentle cleaning method helps maintain optimal stickiness and keeps your mat in good condition between heavier washes. Regularly inspecting for adhesive durability can help identify when a deeper cleaning or replacement might be needed. Proper cleaning techniques are essential for prolonging the life of your mat and ensuring consistent results. Additionally, understanding the costs of replacement mats can help you plan your maintenance routine more effectively. Remember, it’s suited for light debris removal and not for clearing heavy buildup.
How to Wash Your Cricut Mat With Soap and Water
To wash your Cricut mat with soap and water, follow these steps. First, ensure the mat is completely dry and free of loose dust or lint before cleaning. Use warm or lukewarm water, as it helps lift dirt without damaging the adhesive. Apply a few drops of mild dish soap directly onto the surface of the mat. While the mat is wet, gently scrub it with a soft sponge or cloth in circular motions, using light pressure to avoid damaging the tacky coating. Rinsing thoroughly with clean water until no soap residue remains is critical because leftover soap can reduce the mat’s stickiness. Proper cleaning methods help extend the life of your Cricut mat and maintain its optimal performance. Finally, allow the mat to air dry completely — hanging it vertically or placing it on a rack works best. Regular cleaning with soap and water is recommended every few uses to keep your Cricut mat performing at its best.
Deep Cleaning Your Cricut Mat for Heavy Residue
To clean heavy residue from your Cricut mat, begin by scraping away loose debris with a Cricut scraper or a stiff plastic edge. This step helps lift paper fibers, dust, and buildup without harming the adhesive surface. For stubborn residue, apply a small amount of dish soap or an adhesive-removal spray and let it sit briefly to loosen grime. Focus on small sections at a time to prevent spreading the buildup and to avoid abrasions that can damage the adhesive. If you are unsure whether your vinyl is permanent or removable, understanding Cricut vinyl properties can help you choose the appropriate cleaning method. Use a soft sponge, cloth, or gentle scrubber in circular motions to lift persistent grime. Avoid abrasive pads, as they can wear down the adhesive layer. Additionally, regular cleaning and proper storage can extend the life of your Cricut cutting mats, as maintaining clean and properly stored mats reduces the likelihood of heavy buildup. After cleaning, rinse the mat thoroughly to remove any soap or cleaner residue, since leftover traces can weaken grip and lead to more residue buildup. Reconditioning your mat periodically with adhesive renewal techniques can also help restore its stickiness and prolong its usability. Repeat the process as needed, always maintaining a gentle approach to prolong your mat’s stickiness.
How to Properly Dry and Store Your Cricut Mat
After cleaning residue from your Cricut mat, ensuring it is thoroughly dry is essential for maintaining its adhesive quality. The best method is to air dry the mat with the sticky side facing up on a clean, dust-free surface. Elevating or slightly angling the mat helps water to run off and promotes better air circulation, speeding up the drying process. Avoid towel drying, using heat sources like a hairdryer, or placing the mat in direct sunlight, as these can damage the adhesive. Proper drying techniques are crucial to prevent residual moisture that could affect the mat’s stickiness. Peeling the protective cover correctly before drying is important to prevent damage to the sticky surface. Make sure the mat is completely dry before storing to prevent moisture buildup, which can weaken the adhesive grip and cause warping. Once dry, always replace the protective cover to keep dust and debris off the sticky surface. When storing multiple mats, consider color-coding with covers or labels and keeping them in a cool, dry place. Store mats flat to prevent curling or warping, and regularly check for signs of moisture or residue buildup. Handle the mats gently during storage to extend their lifespan and keep them performing at their best.
Common Mistakes That Can Damage Your Cricut Mat
Many common mistakes can easily damage your Cricut mat if you’re not careful. Overusing abrasive tools such as steel wool or stiff brushes can scratch or remove the adhesive layer, weakening its grip. Metal spatulas should be avoided for scraping, as they can also damage the surface. Instead, use gentle, non-abrasive sponges for wet cleaning to preserve the mat’s integrity. Harsh chemicals or degreasing cleaners should be avoided, since they can strip away the adhesive and leave behind chemical residues that hinder proper sticking. Applying too much moisture, such as soaking the mat or towel-drying it, risks damaging the adhesive; light dampness followed by air drying is safest. Heavy circular scrubbing or aggressive scraping can damage the surface further, while neglecting residue buildup over time can reduce the grip. Proper cleaning methods help maintain the adhesive’s quality and reduce the likelihood of needing to replace the mat prematurely. Additionally, understanding the heat transfer vinyl properties can guide you in selecting the appropriate cleaning techniques to avoid affecting the surface of your mat. Regular cleaning and adhesive preservation techniques are essential for extending your mat’s lifespan. To extend your mat’s lifespan, always handle it gently and avoid these common pitfalls.
Maintaining Your Cricut Mat for Long-Lasting Stickiness
To maintain your Cricut mat’s stickiness and extend its lifespan, regularly clean the surface by removing debris with a scraper or tweezers before washing. After each project, inspect the mat for dust, paper fibers, or residue and use transfer tape to gently lift fine lint without damaging the adhesive. Light, frequent cleaning is more effective at preserving tackiness than waiting for buildup. When washing, rinse the mat with warm water, add a few drops of mild dish soap, and gently scrub in circular motions with a soft sponge. Rinse thoroughly and allow the mat to air dry completely before reuse. Avoid rough handling or unnecessary touching of the adhesive surface, and only use compatible materials to reduce wear and maintain stickiness over time. Proper cleaning methods play a crucial role in preventing excessive residue buildup that can compromise adhesion and overall mat durability.