Struggling to cut heat transfer vinyl properly with your Cricut? It might seem tricky at first, but with the right steps, you’ll get clean cuts and professional-looking designs every time.
By learning how to prepare your settings, load your vinyl correctly, and weed with care, you’ll soon be creating flawless projects. Keep reading to master this useful skill and boost your crafting confidence.
Prepare Your Design and Setup in Cricut Design Space
To prepare your design and setup in Cricut Design Space, start by opening a new project. This keeps your workspace clean and organized, giving you a blank canvas for your design layout. Upload your images or text using the upload button or by dragging and dropping files onto the canvas. Once imported, position your design and resize it to match the target surface, such as a T-shirt. Use canvas sizing guides or template overlays to ensure the design fits properly. Proper sizing at this stage helps avoid adjustments later, making the entire process smoother and ensuring your heat transfer vinyl project turns out just right. Understanding the cost factors involved can help you choose the right materials and equipment to stay within your budget. Being aware of beginner-friendly options ensures you select a machine that is easy to use and maintain as you start out. Additionally, using accurate measurements can significantly improve your final results and reduce material waste throughout the process.
Choose the Right Material and Settings for HTV
Choosing the right material and settings for HTV ensures your design adheres properly and lasts through multiple washes. The type of fabric influences your choice of vinyl and heating technique. Cotton, polyester, and blends work well with standard settings, while synthetic fabrics like nylon or acrylic require lower heat to prevent scorching or melting. Selecting the appropriate HTV type—such as Everyday Iron-On for general use or specialty HTV for specific effects—also impacts durability and appearance. Use Cricut’s material selector to match the vinyl brand, which helps you set the correct blade pressure and cut behavior. For heat application, set your machine to around 315°F and press for about 30 seconds, adjusting based on the specific HTV instructions. Apply light to firm pressure during pressing, preheat your fabric briefly before applying the vinyl, and follow the peel guidelines—warm or cool—specified by the manufacturer. Proper material and heat setting choices are key to achieving professional-looking, long-lasting results. Additionally, paying attention to heat transfer principles can further improve your overall results and prevent issues like bubbling or uneven adhesion. This understanding helps you fine-tune your technique for different fabrics and vinyl types. Furthermore, material compatibility can help you avoid damage to your fabric or vinyl during the process.
Load Your HTV Correctly Onto the Cutting Mat
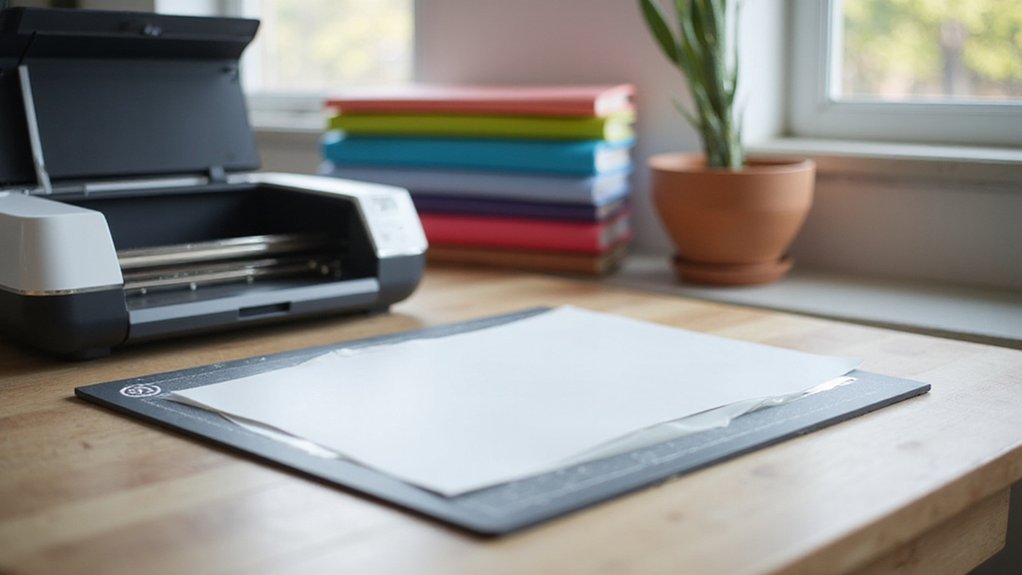
To load your HTV correctly onto the cutting mat, start by ensuring the storage area is clean to prevent debris from transferring onto the mat. Remove the protective plastic sheet from the mat before placing the vinyl. Position the shiny or carrier side of the HTV face down on the mat, with the dull or adhesive side up, facing you. Use the grid lines on the mat to align the vinyl precisely, ideally with the upper-left corner at the origin point. Make sure the vinyl extends slightly beyond your design boundaries to avoid cutting inaccuracies. Press down firmly with a brayer or your hand, working from the center outward, to eliminate bubbles and ensure good adhesion. When loading into the cutting machine, guide the mat evenly under the rollers to prevent skewing. Press the load button to secure the mat in place. Proper placement and secure loading ensure stable feeding through the machine, leading to clean, precise cuts every time. Additionally, understanding the vinyl’s orientation and adhesive strength can help prevent slipping or cutting errors during the process. Checking the cut settings before starting can further enhance your results. Ensuring the correct mat alignment also plays a key role in achieving perfect cuts. Proper mat handling techniques can extend the lifespan of your cutting mats and improve cutting accuracy.
Cut Your Design on Cricut : Step by Step
After your design is complete in Cricut Design Space, the next step is to send it to your Cricut machine for cutting. Begin by mirroring your design, especially if it contains text or directional artwork, to ensure it reads correctly once pressed. Double-check your color selections and set the material to Iron-On or Heat Transfer Vinyl, depending on your project. Use the Fine Point blade and adjust the cutting settings based on the complexity of your design; intricate cuts may require slower speeds or detailed attention. Properly choosing the right dye sublimation ink can also enhance your overall transfer quality if you’re incorporating fabric elements. Attaching overlapping layers to keep spacing fixed is important for accurate cuts, ensuring your final design turns out precisely as intended. Utilizing the correct storage methods can help prevent warping or damage to your vinyl, maintaining durability over time. Utilize the Weld feature to connect shapes that should stay unified. Confirm that the final size matches your intended surface before proceeding. Place the vinyl onto your cutting mat, making sure it’s aligned properly. Select “Make It” in Design Space and follow the prompts to load your mat into the Cricut machine. Ensure your blade is sharp and your settings are correct for a clean cut, which is crucial for a smooth transfer process.
Carefully Weed Away Excess Vinyl
Before peeling away excess vinyl, verify the cut quality with a test cut. This ensures your blade is properly maintained and not cutting too deeply or shallowly. A clean, consistent kiss cut makes weeding easier because incomplete cuts can cause tearing or dragging. Use techniques like bright lighting or bending the vinyl to reveal cut lines and small details, making it easier to identify where to weed. Keeping the vinyl warm can also help, as it softens the material and makes removal smoother; however, avoid overheating to prevent melting. When weeding, start by removing the largest background pieces first, then focus on interior cavities, working from the outside inward. Cutting away weeded sections and pulling slowly helps prevent damage to fine details. Proper storage, such as keeping the vinyl sheet flat and free from dust, maintains optimal cutting quality over time. Regularly checking your cut settings and performing test cuts can prevent issues like tearing or incomplete cuts, ensuring consistent results and helping you adjust the blade or pressure as needed for perfect weeding. Additionally, understanding cut quality is vital for achieving professional results in your heat transfer projects. To enhance your workflow, choosing the right cut settings based on your material type can improve overall efficiency.
Press and Apply Your HTV Design Properly
To guarantee your HTV design adheres perfectly, follow these essential steps. Begin by preparing your surface with a clean, dry, lint-free cloth and washing the garment beforehand without fabric softener to remove any residues that could interfere with adhesion. Pre-press the fabric for 3 to 10 seconds to eliminate wrinkles and moisture, creating a smooth, stable base for the vinyl.
For accurate design placement, mirror your design and position it face-down on the garment. Use guides like the neckline, centerline, or a ruler to ensure precise alignment. Keep the design flat and centered before applying heat. When working with different fabrics or materials, understanding heat application methods is crucial for optimal results. Knowing the properties of sublimation blanks can also help you determine if heat transfer vinyl will work effectively on them.
Use the correct heat, time, and pressure—generally around 305°F to 320°F for 10 to 30 seconds with firm pressure—to ensure proper bonding. Cover the design with a parchment or Teflon sheet to protect both the vinyl and the press during application. If the design isn’t fully adhered, re-press and apply additional heat or pressure as needed.
Finally, allow the garment at least 24 hours before washing, which helps secure the design and prevents peeling or lifting. Following these steps will help you achieve a durable and professional-looking HTV application. Understanding PLA filament can also inform your project choices when working with different materials and gear.
Troubleshoot Common Cricut HTV Cutting Issues
To troubleshoot common Cricut HTV cutting issues, start by examining your material and settings carefully. Material thickness is a frequent culprit; thicker vinyl may require increased pressure and a sharper blade to cut through cleanly. However, avoid settings that cut through the carrier sheet, which can ruin your project. Check your blade for debris or dullness—if it’s dirty or worn, clean or replace it to ensure crisp cuts. Additionally, blade sharpness plays a crucial role in achieving clean cuts and should be checked regularly to prevent issues. Always remember to mirror your design before cutting, as unmirrored HTV will appear reversed once applied. Use the correct material preset in Design Space, which automatically adjusts blade depth and pressure for optimal results. If your design is overly complex, it can cause incomplete or shifting cuts; simplifying your design reduces this risk. Furthermore, understanding removable vinyl can help you choose the right material for easier removal and fewer issues during cutting and application. Proper mat adhesion is also crucial. Make sure your vinyl sticks firmly to the mat to prevent shifting during cutting. Running a test cut in an inconspicuous corner helps verify your settings before proceeding with the full project. By methodically checking these factors, you’ll improve your chances of achieving clean, professional-looking cuts every time.