Figuring out how long to press sublimation shirts can be tricky, but the right time makes all the difference for vibrant, long-lasting results.
Typically, you’ll want to press between 45 and 60 seconds at 400°F, but adjustments may be needed based on fabric type and thickness.
Proper preparation and calibration are key to mastering the perfect press, and the details are just below.
What Is the Ideal Press Time for Sublimation Shirts?
The ideal press time for sublimation shirts generally ranges from 45 to 60 seconds. Starting with around 45 seconds is a good rule of thumb for DIY projects, especially when working with polyester or polyester-blend shirts. Higher polyester content typically requires shorter press times at high temperatures around 400°F to prevent scorching or color bleeding. Conversely, blends with more natural fibers may need slightly longer press times, up to 70 seconds, to achieve vibrant transfers. Consistent heat press pressure and even heat distribution are crucial for accurate results. Always check the manufacturer’s instructions for your specific shirt blank, and perform test prints when working with new fabrics. Adjust your press time in small increments, like 10 to 15 seconds, to fine-tune the process and ensure a durable, vibrant transfer every time. Proper drying of sublimation shirts can also significantly impact the final quality of your prints, and understanding the pressing time can help prevent issues like ghosting or incomplete transfers. Additionally, ensuring the fabric is properly prepped and free of moisture plays a key role in achieving optimal transfer quality.
What Factors Affect Your Sublimation Press Time?
Several factors influence how long you should press your sublimation items, so adjusting your process for each material and object is crucial. Heat distribution plays a significant role—more uniform heat transfer means you can often reduce press time. Fabrics like polyester heat quickly and require shorter durations, typically around 60 seconds, while harder substrates such as ceramics or glass need longer, often between 2 to 4 minutes, because of their poor heat conduction. The thickness and density of the material also affect press time. Thinner items like jewelry or small tote bags heat up and sublimate faster, sometimes in as little as 30 to 60 seconds. Conversely, thicker objects such as trays or tiles need extended durations to ensure proper pigment transfer, often 3 to 4 minutes. Additionally, understanding the heat transfer process can help determine optimal press times for different materials. Proper time management ensures that the heat penetrates thoroughly without damaging the item or causing colors to fade. Consistent pressure and accurate temperature control are also essential to achieving optimal results and preventing defects, regardless of material type. Monitoring the press cycle can help prevent overexposure and maintain quality. Tailoring your press time based on these factors helps achieve consistent, vibrant results.
How Do Temperature and Pressure Influence the Results?
Temperature and pressure are fundamental in achieving optimal sublimation transfers. Maintaining the correct temperature ensures the ink vaporizes effectively, enabling strong and vibrant adhesion to the substrate. Typically, temperatures range between 350°F and 400°F, with precise settings depending on the material and transfer type. If the temperature is too low, the dye may not fully gas, resulting in faded or incomplete images. Too high a temperature can scorch the material, cause color shifts, or lead to ink bleed, compromising the transfer’s quality. Additionally, proper machine calibration is essential to consistently maintain these conditions and achieve the best results. Ensuring that you have the right subliutation press settings can significantly influence your results. Pressure influences how well the transfer contacts the fabric and impacts the evenness of the image. Medium pressure generally works best, providing a firm, consistent contact without damaging the material. Insufficient pressure can cause ghosting or weak adhesion, leading to less vivid images. Excessive pressure might flatten the fabric or distort the transfer, reducing sharpness and detail. Striking the right balance of heat and pressure ensures your sublimation results are crisp, vibrant, and durable, with each factor working together to produce high-quality images. Achieving proper pressure is also crucial for preventing defects like bubbling or uneven transfers.
How to Prepare Your Shirts Before Pressing for Best Results
Preparing your shirts properly before pressing ensures a smooth, vibrant sublimation transfer. Start by choosing shirts made of polyester or with a polyester coating, as dye bonds best with polyester fibers. Make sure the fabric is thoroughly clean and wrinkle-free to prevent flaws during transfer. Use a lint roller to remove lint, dust, or loose fibers that could interfere with print quality. Proper alignment on the heat press is essential; the shirt should be flat and smooth to avoid uneven transfers.
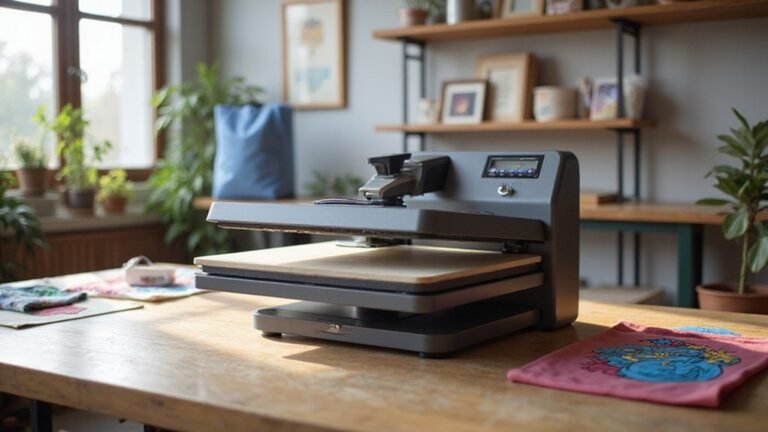
A quick pre-press lasting about 3 to 10 seconds helps remove moisture and relax wrinkles, creating a stable surface for transfer. Place protective layers like butcher paper inside the shirt and over the top to prevent ink bleed-through and protect your press. Securing the transfer with heat-resistant tape ensures accurate placement and helps achieve sharp, clear images. Additionally, understanding the ideal pressing time for sublimation shirts is crucial for optimal results. The temperature setting on your heat press also plays a significant role in ensuring vibrant, long-lasting transfers. Considering equipment calibration can further improve your print quality and consistency. Following these steps guarantees quality results and minimizes common printing issues.
How to Adjust Press Time for Different Fabric Types
Adjusting your press time for different fabric types is crucial for optimal sublimation results. For 100% polyester fabrics, a typical press setting is 375 to 400°F for 45 to 60 seconds with medium pressure. Polyester blends usually need slightly longer press times—around 50 to 70 seconds—since higher polyester content enhances transfer quality. Nylon fabrics require lower temperatures, about 350 to 360°F, with shorter press times to prevent damage, typically 30 to 50 seconds. Spandex needs even gentler treatment, with temperatures around 355 to 365°F and press times of about 30 seconds, to avoid melting or distortion. Heavier fabrics or layered materials may need an additional 2 to 3 seconds to ensure proper transfer without scorching. Always conduct test presses on sample fabrics to refine your settings, as variations in fabric thickness and composition influence the ideal press time. Understanding die cutting machines can also help you create precise designs for your sublimation projects, and being aware of fabric composition can further assist in selecting the appropriate press parameters. Additionally, knowing how sublimation ink interacts with different materials can help prevent mistakes and improve your results.
What Happens If You Press Too Long or Too Short?
Pressing a sublimation shirt for too short a time can lead to faded colors, incomplete image coverage, and duller prints because the ink hasn’t fully transferred into the fabric. If the press time is insufficient—typically under the recommended 60 seconds—the ink doesn’t have enough time to migrate properly. You might notice residual transfer paper ink remaining on the sheet, which indicates an incomplete transfer. The resulting print can appear patchy, faint, or less vibrant, reducing durability and overall quality. Conversely, pressing for too long—beyond the ideal duration—can scorch the fabric, lead to color dulling, and cause visible press lines or texture changes. Over-pressing also risks damaging delicate textiles. Both extremes compromise the robustness and permanence of the sublimation print, making it essential to stick to the recommended press time for optimal results. Optimal temperature and pressure are just as crucial as timing to achieve the best possible finished product.
Tips for Achieving Consistent, Vibrant Sublimation Transfers
To achieve consistently vibrant sublimation transfers, focus on several critical factors. Use substrates that are high-quality, ideally 100% polyester with a smooth, light-colored surface. This enhances color saturation and ensures the transfer pops. Proper preparation is essential—pre-wash fabrics to remove any residues and thoroughly lint-roll to prevent fibers from interfering with ink absorption.
Opt for artwork with a resolution of at least 300 DPI and ensure your color profiles are accurate. This maintains the integrity of your colors during printing. Selecting premium sublimation ink and paper is vital; cheaper options often result in duller or uneven transfers. Set your printer to its highest quality, high-speed off mode to optimize color vibrancy and detail.
Consistent heat and pressure are non-negotiable. Use a heat press that offers even heat distribution and accurate temperature control, typically between 375-400°F depending on the substrate. Keep an eye on pressure to ensure uniform contact across the entire transfer. Regularly calibrate your press and document your settings, so you can replicate successful results.
Performing test prints and keeping detailed records of your settings can help you troubleshoot issues and achieve repeatability. Following these guidelines will not only produce bright, vibrant images but also enhance the durability of the finished product, ensuring your sublimation transfers stay vibrant over time. Proper calibration is also essential to achieve consistent, professional results. Additionally, understanding the heat pressing duration and how it impacts transfer quality is crucial for optimal results.