Struggling to get your heat transfer vinyl to peel cleanly? Weed removal can seem tricky, but with the right techniques, it becomes much easier.
Knowing how to soften the vinyl and use sharp tools can help you achieve clean, precise results every time. Keep reading to learn the simple steps that will make weed removal your new favorite part of the crafting process.
Get Your Workspace and Vinyl Ready for Easy Weeding
To ensure a smooth weeding process, your workspace must be clean, flat, and organized before you start working with heat transfer vinyl. Clear the area of unnecessary tools to prevent accidents and remove dust, lint, or debris that could stick to the vinyl’s adhesive side. Proper storage of tools like EZ Weeder® or tweezers keeps them within easy reach and reduces clutter, speeding up your workflow. Make sure the cutting mat lies flat to prevent vinyl shifting, which can lead to mistakes. The vinyl should be unrolled and relaxed, free of creases or folds, with the carrier sheet smooth and wrinkle-free. Maintaining a tidy, stable workspace protects your materials and enhances accuracy and efficiency during weeding. When working with sublimation paper, consider where to buy sublimation paper to ensure you’re using high-quality supplies for the best results. Since cutting mats provide a stable, flat surface, they are especially important for precise cuts and preventing damage to your materials. Additionally, understanding how heat transfer vinyl adheres and releases can help you achieve cleaner weeding results.
Use Gentle Heat to Loosen the Vinyl Before Weeding
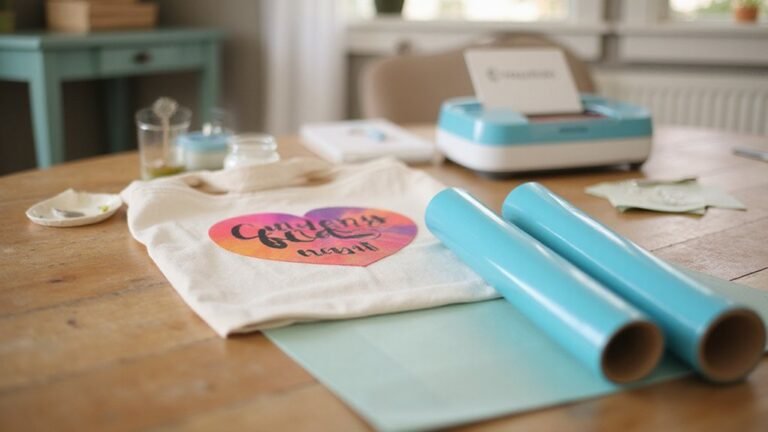
Applying gentle heat to heat transfer vinyl (HTV) significantly eases the weeding process by softening the adhesive layer. Use a brief burst of heat, around 5 to 7 seconds, with tools like a hair dryer, to loosen the adhesive. Moderate settings on an iron or heat press—typically between 250°F to 275°F—also work effectively. Always protect the fabric with a pressing cloth, parchment paper, or a thin cotton layer to distribute heat evenly and prevent scorching. The key is to achieve enough pliability to lift the vinyl easily without melting it. Once the adhesive softens, gently lift an edge with a weeding tool or tweezers for smooth removal, reducing the risk of tearing or stretching. Heat settings can vary depending on the type of vinyl, so it’s important to test on a small area first. To ensure the best results, consider the adhesive properties of your specific vinyl to avoid over-softening. Using proper heat application techniques can make all the difference in achieving clean weeding.
Step-by-Step: How to Precisely Weed Your HTV Design
To achieve a clean and professional-looking design, it’s essential to weed your HTV with precision. Begin by creating a weeding border—using a box or square around your artwork—to clearly define edges and isolate cut areas. Use quality weeding tools, such as a pick or tweezers, to lift excess vinyl smoothly. Start at a corner of the design and peel back at a controlled 45-degree angle to minimize stretching or tearing the vinyl. Always weed on the cutting mat to prevent waste and for better control during the process. Proper cut setting accuracy can also help ensure cleaner cuts and easier weeding, reducing the risk of mistakes.
Additionally, understanding the proper heat transfer vinyl techniques can prevent mistakes and ensure a durable, professional finish. Section your design logically to reduce mistakes; remove background areas first, then inner cavities, which prevents accidental lifting of desired parts. Enhance visibility by working in a well-lit environment or using a light pad to increase contrast and reveal faint cut lines. For extra accuracy in delicate details, employ transfer tape or masking tape to keep small elements aligned and stable during weeding, ensuring precise adhesion throughout the process. Being aware of transfer tape and its role can greatly improve your overall weeding efficiency and accuracy.
Removing Small and Intricate Details Carefully
To carefully remove small and intricate vinyl details, start by using magnification and bright lighting like a lightbox or strong lamp. Good illumination makes tiny lines, small holes, and internal shapes more visible, lowering the risk of missing leftover fragments or tiny vinyl islands. When working on internal cut-outs such as internal shapes in letters like O, A, and P, peel them out carefully using tweezers or fine-point tools to avoid tearing delicate areas. For stubborn micro-details, reheating the vinyl slightly softens the adhesive, making tiny pieces easier to lift without damaging surrounding cuts. Always work slowly and patiently, pulling at about a 45-degree angle to prevent tearing or distorting the design. Utilizing the proper transfer tape techniques can also help lift delicate pieces cleanly and prevent adhesive residue from damaging your design. Proper handling and understanding of heat transfer vinyl properties can extend the lifespan of your work and make delicate details easier to manage. Additionally, familiarizing yourself with the vinyl manufacturer’s instructions ensures you are using the correct techniques for each specific type. These careful steps help ensure that every small detail stays clean and intact, giving your finished design a professional look.
Double-Check Your Design Before Pressing
Double-check your design before pressing to avoid costly mistakes. Start by confirming the design orientation to ensure it’s correctly flipped before cutting. This prevents reversed images or text from appearing on your final product. Next, review the layer alignment, especially for multi-layer designs, since adjustments after pressing become difficult and may compromise the overall look. Verify that all weeded pieces fit together properly and that no unwanted vinyl remains around or inside the design, which can cause imperfections. Use bright light or a lightbox to inspect the layout closely, helping to spot tiny leftovers, misplaced elements, or reversed parts. Gently stacking layers helps confirm they align correctly before heating. Registration marks or sectioning can be useful tools for precise placement. Performing these quick checks saves time and prevents errors, ensuring a flawless final result. Additionally, properly preparing your surface and tools can significantly improve the accuracy of your application process.
Troubleshooting Common Weeding Problems
Troubleshooting stubborn weeding problems starts with identifying the root cause. Poor vinyl storage is a common issue; if the adhesive has hardened or dust has accumulated, weeding becomes more difficult. Ensure your vinyl is stored in a cool, dry place and properly sealed to maintain its tackiness. Check your cutting machine’s maintenance as well—blades need to be sharp and correctly adjusted. Dull blades tend to produce shallow or uneven cuts, making weeding more frustrating. If the cut lines are faint or hard to see, improve lighting or place the vinyl over a bright background to enhance visibility. Adjust the cut depth if cuts are too deep, which can cause tearing, especially on delicate vinyl. When working on intricate or interior sections, remove inner pieces first by gently pulling at consistent angles. Slow, controlled peeling minimizes tears and ensures cleaner weeding. Additionally, regularly clean your weeding tools and recut the vinyl as necessary to keep the material clean and ready for precise weeding. Proper storage of HTV also plays a significant role in successful weeding, as keeping it in optimal conditions preserves the adhesive properties and workability. Being aware of the material characteristics, such as flexibility and tackiness, helps prevent common weeding issues. It’s also helpful to understand how the cutting technology you use impacts the quality of your cuts and weeding process.
Final Tips for a Perfect HTV Transfer
To ensure a perfect HTV transfer, it’s crucial to follow the manufacturer’s recommended settings for temperature, time, and pressure specific to your vinyl. Pay close attention to color contrast when layering multiple colors; use the lowest recommended temperature to avoid overexposure that could dull or burn the vinyl. For each layer, opt for a quick tack press instead of a full press to prevent overheating before completing the design, especially when adding multiple colors. Using a Teflon sheet or parchment paper as a protective barrier helps prevent sticking to the heat press and shields your vinyl from excessive heat. Proper storage of your vinyl rolls or sheets keeps them in optimal condition, preventing issues like cracking, shrinking, or casting that can affect final results. It’s also helpful to store vinyl properly in a cool, dry environment to extend the longevity and quality of your materials. Follow peel instructions precisely—whether hot, warm, or cold peel—as the timing impacts how well the adhesive bonds without distorting the design. Additionally, correct vinyl storage practices ensure your materials remain in top condition, preventing issues that could compromise your project quality. Applying these final tips helps you achieve a durable, professional-looking transfer with vibrant, long-lasting colors.