How to Use a Cutting Mat: Easy Step-by-Step Tutorial
Ever wonder how to make clean, precise cuts without damaging your workspace? Using the right cutting mat can make all the difference.
With a sturdy, self-healing mat and proper technique, you’ll be able to cut fabric or paper smoothly and safely every time.
Keep reading to discover the simple steps that’ll help you get the most out of your cutting mat.
How to Prepare Fabric for Accurate Cutting
Washing and drying your fabric in the same way you’ll use for your finished project is essential for accurate cutting. Proper fiber choice matters because different fibers respond distinctively to laundering, affecting shrinkage and stability. Pre-washing helps control fabric tension and minimizes later shrinkage; for example, cotton can shrink between 3% and 7%. After washing, let the fabric relax before cutting—knits may need 12 to 24 hours, while wovens typically require 6 to 8 hours—so the fabric settles and reduces distortion. Understanding fabric shrinkage properties is crucial because it influences how you handle and prepare your fabric before cutting. Additionally, being aware of fabric tension can help you better plan your cutting strategy. Properly prepared fabric remains flat, aligned, and free of distortions, making your cuts more accurate and your final project more precise. Taking the time to measure and mark fabric accurately ensures that your cuts are precisely aligned with your pattern pieces. Recognizing the importance of fabric stability can further improve your cutting results and prevent issues during assembly.
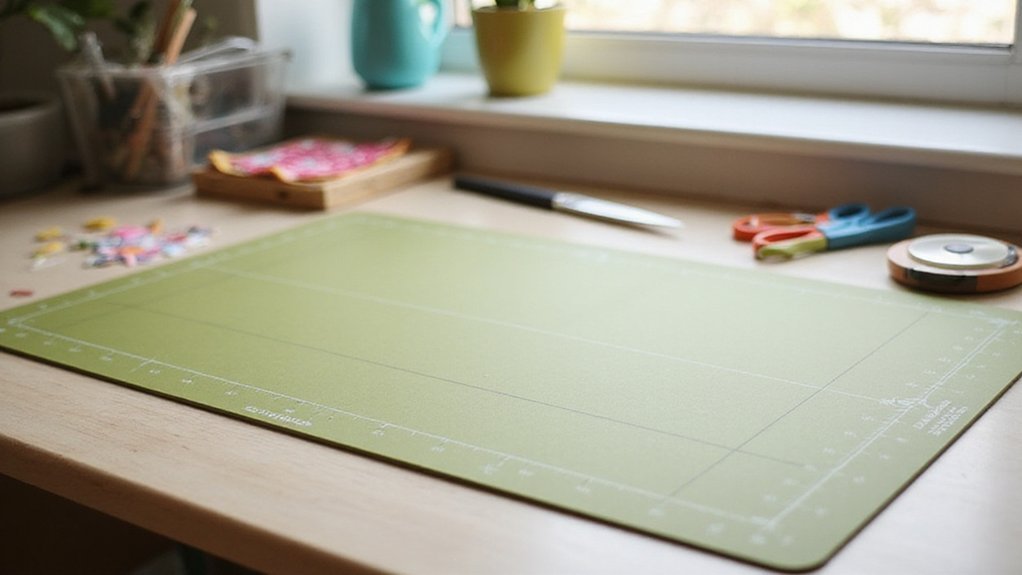
Choosing the Right Self-Healing Cutting Mat
Choosing the right self-healing cutting mat hinges on several key features. Focus on mats made from layered polymer materials, as their ability to rebound after cuts ensures your fabric edges remain smooth and clean. To test recovery, make a few moderate-pressure cuts; a quality mat will show no visible groove afterward, indicating good self-healing properties. The self-healing ability of the material is crucial, as it determines how well the mat recovers from repeated cuts without permanent damage. The material’s durability can also impact the overall lifespan of the cutting mat. Thickness matters too—aim for mats around 3 to 5 millimeters thick. Thicker mats provide better support and prevent blades from penetrating or damaging the surface, especially when using rotary cutters or utility knives frequently. A durable mat can also extend the lifespan of your blades by providing a smoother cutting experience. Ensure the size fits your workspace and preferences; larger mats offer more cutting area but may be less portable. Look for clear measurement markings in both imperial and metric units, which facilitate precise cutting and layout planning. A non-slip backing with rubberized dots helps keep the mat stable during use, reducing slipping accidents or uneven cuts. Overall, selecting a durable, well-supported mat enhances cutting accuracy, maintains your tools’ sharpness longer, and provides a safer, more efficient workspace. When choosing, consider the material’s self-healing ability and how it handles frequent cuts to ensure longevity.
Setting Up Your Workspace for Precision Cutting
A well-organized workspace is essential for achieving precise cuts and ensuring safety. Start by clearly marking your cutting area using tape or chalk to define the footprint. Make sure there is enough clearance on all sides for the smooth infeed and outfeed of materials. Keeping walk paths clear prevents accidents and reduces traffic through the work zone, maintaining focus and safety.
Use a stable and flat surface for your work. Check it with a level or square to ensure accuracy in your cuts. Proper organization involves arranging your tools, rulers, clamps, and weights beforehand, so everything you need is within easy reach. Good lighting also makes a difference; position task lights to minimize glare and provide even illumination across the workspace.
Always wear protective gear such as safety glasses and dust masks when necessary. Regularly perform safety checks and keep your work area clean. A tidy, well-lit, and properly equipped space promotes efficiency and safety, helping you make precise cuts with confidence. Additionally, proper workspace organization can help prevent mistakes and material waste.
How to Measure and Mark Fabric Correctly
To measure and mark fabric correctly, start by identifying the wrong side of the fabric and a straight, stable reference edge, such as the selvage. Always mark on the wrong side to keep markings hidden during construction. Use a ruler, yardstick, or flexible tape measure, ensuring the fabric is flat and free of wrinkles, folds, or twists before starting. Work on a hard, smooth surface to prevent shifting and maintain accuracy. Measure from a consistent edge, preferably perpendicular to the selvage, to ensure precise measurements. Mark with small, clear indicators like dots or short dashes, placing backup marks inside seam allowances for clarity. Double-check all measurements against your pattern or templates, and verify that the fabric is aligned on grain to ensure accurate cutting and sewing. This approach helps prevent inaccuracies caused by fabric distortion or bias. Additionally, understanding how different types of filament materials affect fabric behavior can improve your marking precision. Being aware of fiber content can also influence how you handle and mark different fabrics for more accurate results. Recognizing fabric stretch is crucial when working with stretchy or knit fabrics to achieve accurate marking and cutting.
Using a Ruler to Make Straight Cuts
To make straight cuts using a ruler, start by selecting a clear, wide quilting or acrylic ruler that allows you to clearly see the cutting line. Place it on a self-healing cutting mat to protect your surface and provide stability. Align the ruler with the fabric’s grain, fold, or selvedge for accuracy. Ensure the edge of your fabric is square, smoothing and pressing it flat to minimize distortion and keep pattern matches precise. Hold the ruler firmly with your non-cutting hand, spreading your fingers for better control, and keep your fingertips away from the blade’s path. Use a sharp rotary cutter or utility knife and begin cutting with a smooth, continuous motion, keeping the blade perpendicular to the ruler for clean, precise edges. Frequently recheck the alignment of the ruler to maintain accuracy throughout the cut. Additionally, regularly inspecting the ruler for warping or damage is essential, as a warped ruler can affect cutting precision. To ensure your cuts remain consistently straight, it’s helpful to verify the quality of your cutting tools before beginning each project. Also, understanding how to properly align your materials plays a critical role in achieving professional results with straight cuts.
How to Cut Fabric Safely With a Rotary Cutter
To guarantee safety while cutting fabric with a rotary cutter, follow these key practices. Always use a self-healing cutting mat to protect your workspace and ensure smooth blade movement. Lay your fabric flat and fold it neatly to keep multiple layers stable and prevent slipping. Position the rotary cutter’s blade just before the fabric edge and against your ruler for precision and control. Keep the cutter at a 45-degree angle and push forward with steady, even pressure, avoiding pulling back on the cutter. Hold the ruler firmly with your non-dominant hand, keeping your fingers spread and well away from the blade path. Use light, continuous pressure to make a clean cut in one smooth motion — rushing can lead to accidents. When not in use, always engage the safety blade guard. Restrict cuts to no more than four to six fabric layers at a time to maintain control and reduce the risk of injury. Proper handling of the rotary cutter, including maintaining a sharp blade and correct technique, significantly helps prevent slips and accidents.
Repeating Cuts for Consistent Sizes
Using stop blocks is the most straightforward way to ensure consistent piece lengths when making repeated cuts. Set the stop block at your desired measurement from the blade, then clamp or screw it in place for multiple cuts. This approach guarantees that each piece will be the same length, saving time and reducing measurement errors. For increased accuracy, you can create a template using a precisely cut piece as a guide. Align subsequent workpieces with this template to transfer measurements accurately, helping to prevent drift over multiple pieces. To further enhance the accuracy of your cuts, consider heat transfer vinyl on leather because understanding compatible materials and techniques can prevent damage and ensure clean results. Both stop blocks and templates streamline the process, making batch production quicker and more consistent. Additionally, understanding material safety and toxicity can help prevent health hazards when working with certain crafting materials and tools. Incorporating precision measuring tools such as calipers or squares can also significantly improve cut accuracy. Creating a custom jig can further improve accuracy and efficiency in repetitive cuts.
Troubleshooting Common Cutting Problems
To troubleshoot common cutting problems, start by inspecting your blade for dullness or damage. A worn or chipped blade can significantly impact cut quality, causing rough edges or incomplete cuts, so replace or sharpen it as needed. Check if the blade holder moves smoothly; sticking or catching can be caused by debris buildup or wear, which may require cleaning or maintenance. Ensuring your machine is properly calibrated is crucial, especially the blade-offset adjustments, to prevent drift or missed corners. Match your cutting parameters—speed, pressure, and depth—to the material’s thickness, because incorrect settings often lead to jagged edges or incomplete cuts. Securely align the tool and firmly attach the material to prevent shifting during cutting. Regularly cleaning machine parts, nozzles, and components helps prevent obstructions that could disrupt performance. Understanding transfer tape and its role in your projects can also help identify issues related to adhesive or material selection, ensuring cleaner cuts and better results. Additionally, maintaining proper machine maintenance can extend the lifespan of your cutter and improve overall performance. Going a step further, paying attention to cutting environment conditions, such as temperature and humidity, can also influence cut quality and consistency. Following these steps will help you resolve issues effectively and keep your cuts clean.
Maintaining Your Cutting Mat for Long-Term Use
Regular cleaning is essential for maintaining your cutting mat and ensuring its longevity. For high-use mats, aim to clean at least once a week; lighter use may only require bi-weekly cleaning. Use a soft cloth or brush moistened with warm or room-temperature water and mild soap to wipe down the surface. Focus on removing dust, debris, and adhesive residues that can accumulate over time. For a deeper clean, soak the mat in cool to lukewarm water mixed with a small amount of white vinegar. Gently scrub the surface to loosen stubborn residues. Always dry your mat thoroughly after cleaning to prevent warping or curling. Storage practices, such as keeping your mat flat in a protected, level space away from direct sunlight and heat sources, help preserve its condition. Avoid harsh chemicals and abrasive scrubbing to help preserve the surface and extend its useful life. Additionally, understanding what materials are food safe can help you choose the right adhesives and cleaning methods to keep your workspace both clean and safe. Proper maintenance techniques contribute significantly to the durability of acrylic sheets, ensuring your tools and workspace remain in top condition for future projects.