If you’ve ever wondered how to get vibrant, long-lasting designs on your items, sublimation paper might be just what you need. Using it involves a few simple steps—creating the right design, printing it correctly, and applying heat in the right way.
Mastering these basics will set you up to produce professional-looking personalized items. The detailed process is right below.
What Is Sublimation Printing and Why Is It Popular?
Sublimation printing is a digital process that uses heat, pressure, and time to transfer dye from specially designed sublimation paper onto various surfaces. The process involves sublimation inks that transform into gas when heated, bonding permanently with the material’s surface to create embedded images. This results in vibrant colors with high detail that do not fade over time. To ensure the best results, controlling the temperature, pressure, and timing is crucial during the printing process. Properly maintaining consistent heat levels helps achieve uniform color transfer and prevents defects in the final product. The technique is especially popular because it produces durable prints that resist fading, cracking, and peeling, making them suitable for long-term displays. It works best on polyester fabrics and polymer-coated surfaces, where the dye bonds seamlessly to produce bold, vivid results. Achieving optimal quality depends on controlling temperature, pressure, and timing to ensure maximum color vibrancy and durability. Proper execution results in professional-looking projects that stand the test of time.
How to Create and Prepare Your Sublimation Artwork
To ensure your sublimation artwork looks sharp and vibrant, start by creating high-resolution design files at 300 DPI. This resolution guarantees fine details stay crisp when printed. Use RGB color mode for your designs, as it produces more vivid and saturated images on screen. However, always perform test prints to verify color accuracy because colors can shift during printing. For complex, scalable designs, vector graphics are preferred because they maintain sharp edges regardless of size. Raster images should be exported at the final print size to avoid pixelation. Remember to mirror your design horizontally, especially for text and logos, to prevent reversals on the finished product. Keep important elements away from the edges and include bleed areas to avoid cropping issues. Finally, double-check all details such as spelling, alignment, and color fidelity to ensure your artwork is completely ready for a flawless sublimation transfer. Proper preparation ensures the best possible results in your sublimation projects.
Setting Up Your Printer for High-Quality Sublimation Prints
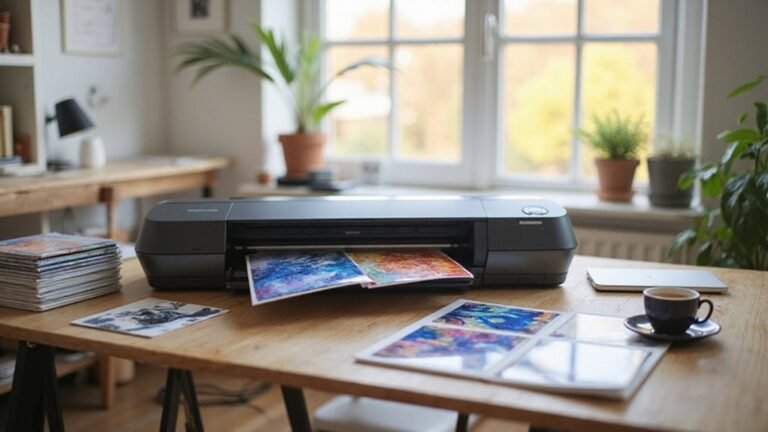
To achieve high-quality sublimation prints, proper printer setup is essential. Begin by installing the correct printer driver and utilities specifically designed for your model. Next, convert your inkjet printer for sublimation use by matching it with the appropriate sublimation ink formulation. Place your dedicated sublimation printer on a stable, flat surface near an electrical outlet to prevent movement during printing. Before changing any preferences, turn on your printer and complete the initial setup process. Set the paper type to matte media such as Premium Matte and match the paper size precisely to avoid scaling issues that can distort your design.
For optimal print results, select the highest or a very high resolution, typically around 1440 x 720 dpi. Slowing down your print speed can improve detail and color accuracy. Use ICC profiles for your specific printer and media to ensure color accuracy, and disable automatic color adjustments to maintain control over the final output. Remember to enable mirror printing, which flips your design horizontally, so it appears correctly when transferred onto the substrate. Regular maintenance routines like nozzle checks and print-head cleanings are crucial to prevent clogs and keep your printer performing at its best.
Prepping and Cleaning Your Substrate for Better Transfer Results
Thoroughly prepping and cleaning your substrate ensures optimal transfer results. Start by removing dust, lint, and debris with a sticky lint roller or velvet roller, especially on delicate or textured surfaces. Use compressed air to clear fine particles from hard-to-reach areas. Clean the surface with a non-abrasive cleaner to eliminate surface dirt and residues, then wipe with a solvent like 70% isopropyl alcohol to remove oils and residues that could interfere with adhesion. Always dry the surface completely using lint-free towels or microfiber cloths to prevent moisture-related defects. Handle your substrate carefully to avoid recontamination — avoid touching the cleaned area. For hard surfaces, wiping with microfiber cloths is effective, but for plastics, exercise caution with liquids to prevent blistering. Cleaning with alcohol also helps to remove fingerprints, oils, and manufacturing residues from surfaces, ensuring a thoroughly prepared substrate. Proper preparation minimizes contamination and helps achieve the best possible transfer quality. Additionally, understanding the cost factors influencing substrate preparation can help optimize your workflow and budget. Considering the initial surface condition can significantly affect the final results, so proper cleaning is essential before starting your sublimation process.
How to Position and Secure Sublimation Paper Correctly
To ensure a successful sublimation transfer, you need to position and secure your sublimation paper correctly. Start by placing the print face down, ensuring the printed side contacts the substrate directly for a clear transfer. Before printing, mirror the design; this way, the final image will read correctly after pressing and be aligned precisely where you want it. Use heat-resistant tape to secure the paper, applying multiple points along the edges and corners. This prevents movement during pressing, which can cause ghosting, blurring, or fuzzy edges. Additionally, consider the proper use of permanent vinyl if you’re combining materials, as certain materials may require specific handling to prevent damage. Make sure the paper lies flat and is free of creases or wrinkles. Movement during pressing can ruin the design’s sharpness, so firm securing and consistent pressure are crucial. Place a protective top sheet, such as Teflon or parchment paper, over the entire setup. This shields the setup from direct heat, preventing scorching or damage to your print. Regularly check the alignment during setup to maintain perfect positioning, enhancing the vividness and detail of your transfer. Proper securing and alignment help ensure your transfer is sharp, vibrant, and free of unintended marks or distortions.
Operating the Heat Press: Temperature, Pressure, and Timing Tips
To operate your heat press effectively, start by confirming the calibration. Use a thermometer to verify that the displayed temperature matches the actual temperature within a margin of plus or minus 5 to 10°C. This ensures consistency and accurate color reproduction in your transfers. Always avoid exceeding the manufacturer’s maximum temperature ratings to prevent scorching or damage to the substrate or equipment. When working with acrylic, it’s also important to note that heat transfer vinyl can be used effectively if the proper temperature and pressure are maintained, but always test on a small piece first. For most sublimation projects, set the heat press between 350 and 400°F. Adjust this range based on the specific material and substrate you’re working with. Fabrics generally require medium pressure, which is firm but not excessive, while hard surfaces like ceramic or metal benefit from applying firm pressure. Timing varies widely depending on the project—about 35 seconds for fabrics and 3 to 4 minutes for mugs. It’s wise to perform a small test press first if you’re uncertain about temperature accuracy. Regularly check that the platen heats evenly across its surface to avoid uneven transfers and ensure the best possible results. Additionally, understanding the importance of sublimation paper helps to select the right type for optimal transfer quality. For enhanced results, incorporating a calibrated heat press ensures more precise temperature control and consistency across projects.
Cooling and Removing the Transfer for Vibrant, Clear Results
Cooling and removing the transfer at the correct moment is key to achieving vibrant, clear results. Allow the item to cool sufficiently before peeling to prevent ghosting and ensure sharp, vivid images. For hot-peel papers, peel immediately after pressing with a smooth, steady motion. For cold-peel papers, let the item cool completely—about 5 to 10 seconds—before peeking at the transfer. This brief cooling period reduces shifting and helps maintain alignment. Using the correct application technique ensures that your design stays vibrant and sharp. During cooling, keep the substrate undisturbed to avoid shadowing or misalignment. Check for readiness by feeling the surface: a slightly cooled surface indicates it’s safe to peel, while full cooling means the transfer can be removed without sticking. Proper transfer removal technique is essential for maintaining clarity and avoiding damage to your design. Always peel in one fluid, continuous motion to prevent dragging or smudging. After peeling, examine the transfer straight away to confirm complete release and sharpness, which preserves the vibrancy and clarity of your design. Incorporating a proper cooling method can help in achieving more consistent and professional results.
Troubleshooting Common Sublimation Problems and How to Fix Them
To fix common sublimation problems like faded images or unwanted spots, start by checking your ink quality. Low ink levels or poor-quality ink can lead to dull colors or inconsistent transfers. Make sure your sublimation paper is stored properly—keep it dry, cool, and sealed to prevent moisture absorption, which causes spots or streaks. For faded or dull prints, verify your printer’s color settings and select the highest-quality print mode, avoiding fast-print options. Using a matte paper setting often improves color transfer and vibrancy. If spots or ink marks appear on your transfer, clean your printhead thoroughly and run a cleaning cycle. Inspect your workspace for dust contamination, as dust can cause unwanted spots. Maintaining high ink quality and proper paper storage are essential steps to troubleshoot effectively and achieve vibrant, clean sublimation results.